

It was hard to do this while I had two kiddos awake and playing one minute and crying the next but I eventually got it done.
Things you will need:
- at least 3/4 yard of knit or stretch fabric ( I used prob about 1/2 a yard for 12m leggings)
- coordinating thread
- 1 yard of 3/4 inch or 1 inch knit elastic
- ballpoint needle (for knit fabric) and ballpoint twin needle (opt.)
- scissors, pins, etc.
Start by creating a pattern. I wont show you how to do this but go HERE for a comprehensive tutorial. MADE explains it way better than I ever could.
Once you have your pattern, take one end of your fabric (make sure the stretch of your fabric goes from left to right) and fold it over enough to accommodate the pattern. Place the straight edge of the pattern on the fold, pin, and cut out.


Once that is cut out cut off the excess pieces to create a straight edge and fold over the end of the fabric again. Flip pattern over so that you are doing the mirror image of the pattern. Pin and cut out.

This is what your fabric pieces should look like so far.

Now its time to cut out the cuff pieces for the bottom. Fold your fabric over once again and pin your pattern on the edge to get the correct width. This will be folded in half, hot dog style, so you can do the height whatever you would like. I did mine 3 inches so when folded in half it would be an inch and a half. Unfold the cuff piece and cut out another.

Your pieces should look like this unfolded.

Next we are going to sew the cuff.
Fold in half long ways, pin and sew.
* When sewing with knit fabric I have found that using a stretch stitch (shown below) works the best for me. I have seen lots of people use just a zig zag stitch but I recommend doing some on a test piece and find what works best for you. Using a straight stitch, for me, anytime I would stretch the fabric after I sewed it the stitches would break but I found the stretch stitch allowed the fabric to stretch and keep the stitches in tact.


Repeat last step with second cuff.

Place like side of cuff to the bottom of the larger piece. Pin and sew.

Fold piece over and iron out the seams for a more professional look.
Repeat last step with second cuff and larger piece.

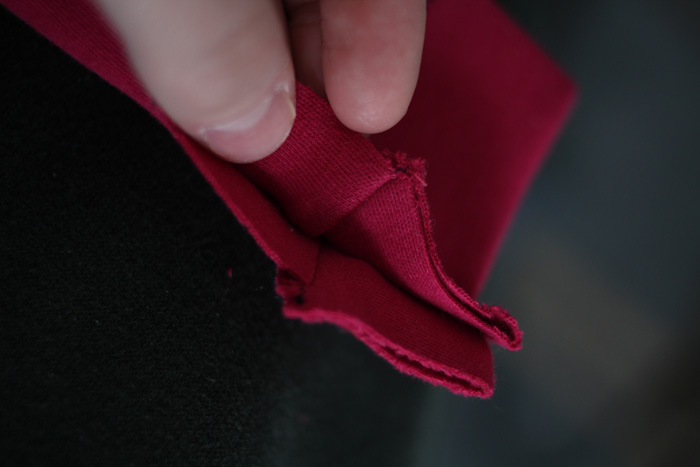
Take both larger pieces and place like sides together and pin down the sides. Shown below. Sew down both sides just to the point.

When sewing down the sides sew one side with a larger seam and that will be the front. The other side will be a smaller seam because it has to allow for a diaper.

Now take those seams you just sewed and line them up.

First line up the crotch and pin. Continue to pin all the way down each leg.
Make sure the cuffs line up straight as well.


Now sew in the U shape from one cuff to the other with about a 1/4 seam. What I have learned is to tapper in the cuff just a little bit on each side because it looks better and will hug the ankle better. Once this is done turn them right side out and admire your work cause you are almost done.
* You can try them on your little one to see if you need to sew them with a bigger seam or not.

Now turn them back wrong side out.
Double fold down the top to form a casing to feed your elastic through. My elastic is 3/4 inches so i folded it down twice to leave about an inch casing for me to work with. Pin and flip the leggings back right side out.
* I always cut a little more off the top of the front so the front is lower then the back. Also try these on your little one before you fold them down so you can get an estimate of how high you want the rise to be. I always try to make them not so high waiste but high enough in the back to cover the diaper. You may have to cut some fabric off the top or fold more under to make a shorter rise.


Now starting at the back sew a 1 inch casing around the waist leaving about a 1 1/2 inch opening to feed the elastic through.
*I usually use my twin ballpoint needle to sew this (see HERE for more on twin needle) . I think it looks more professional but a single line works great as well or if you are feeling up to it just sew a 2nd line all the way around. Also just using a plain straight stitch works just fine.

Take your measuring tape and wrap it around your little ones waist to get their waist size then add an inch to that for overlap. Measure and cut your elastic.
Attach a safety pin on the end of your elastic and start feeding it into the casing. Make sure your elastic doesnt twist as you feed it through.


Once you feed the elastic all the way through the casing pull it out enough to overlap the elastic about an inch or so. Zig zag stitch the elastic to keep it from pulling apart.


Now stretch out your waistband so that the elastic will slide nicely into place. Pin and sew the opening closed and viola YOUR DONE!!!

I decided to sew a piece of patterned knit in the back of the waistband as a label just to better help me know what is the front and the back.

Now try them on your little one and admire your work. Now that wasnt so bad.


I hope that was easy to understand. It was quite the task to to a tutorial so I hope I didnt leave anything out. Let me know if you liked this.

Love. Someday I will have to get my sewing machine repaired and give these a try!
ReplyDelete